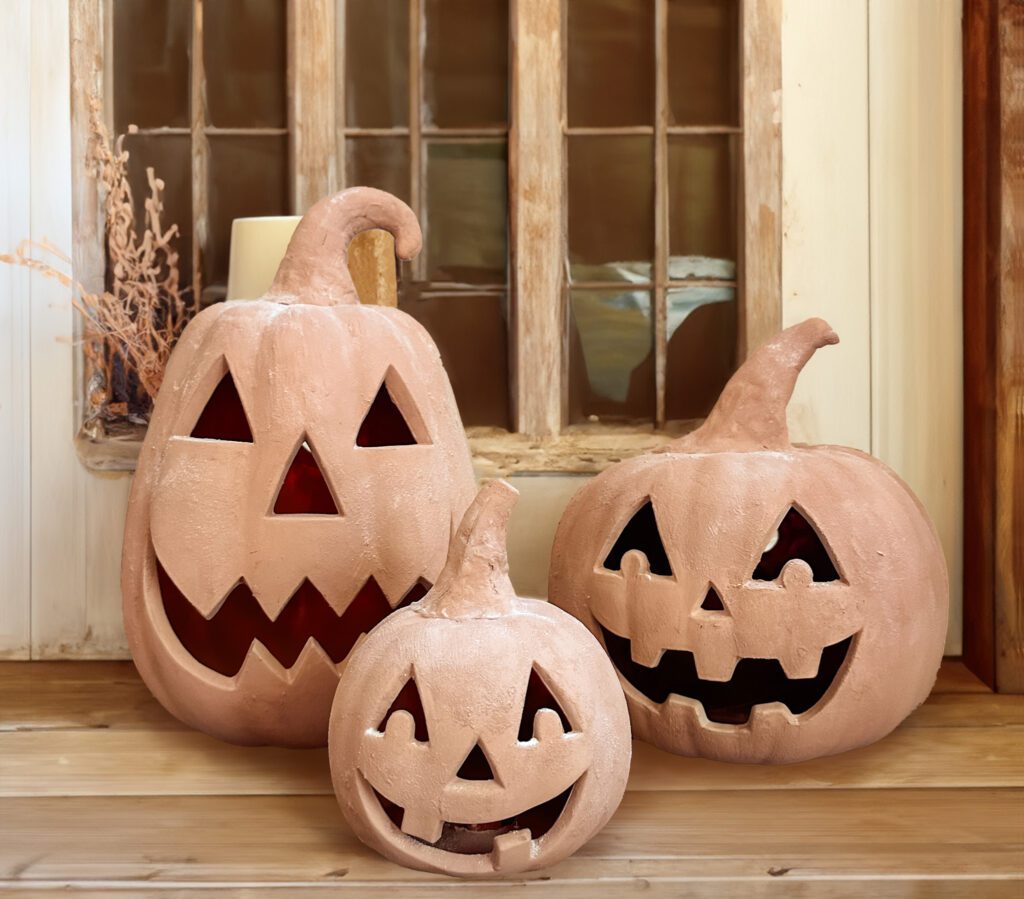
There’s something about those beautiful terracotta pumpkins that give off the perfect, rustic autumn charm. But if you’ve been on the hunt, you’ve probably noticed they’re sold out everywhere! Don’t worry though—with a few simple supplies, you can recreate the Pottery Barn-inspired look right at home, and the best part? It’s budget-friendly! We found the original inspiration from Studio Riu Home on TikTok, and couldn’t wait to give it a try ourselves.
Here’s how you can make them—perfect for when you’re bummed you didn’t snag the originals!
Gather Your Supplies
We picked up all of our items from our local Walmart, but you’ll be able to find these at most craft or big box stores:
- Three foam pumpkins (small, medium, and large):
- Small pumpkin 5 in.
- Medium pumpkin 9 in.
- Large pumpkin 9 x 11 in.
- Acrylic paints (we used Apple Barrel)
- Air-dry clay (we used Play-Doh brand)
- Baking soda or flour for texture
Step 1: Add Whimsy to the Stems
Start by giving your pumpkins a little extra charm! Use air-dry clay to elongate the pumpkin stems for a whimsical, imperfect look. Don’t worry about getting the shape just right—the beauty is in the quirks! Once you’re happy with the stems, let the clay dry completely before moving on.
Step 2: Create Your Base Paint
Mix together equal parts of the chestnut and white paint, then add a few drops of pumpkin orange. Stir everything on a plate until the color blends well. Now, paint the entire pumpkin with this mixture.
If you’re using light-up pumpkins, take a moment to turn them on and make sure the light still shines through evenly. If the paint looks patchy, add another layer until you get a nice, even coat. Let the paint dry completely before moving on.
Step 3: Add Texture
For that terracotta feel, we’ll need to add some texture! Mix another batch of the same paint, but this time slowly stir in some baking soda or flour until you get a paste-like consistency. You want it to be a little more wet than crumbly, so it glides on easily.
Using a brush, apply this textured mixture over the base paint. Don’t aim for perfection—after all, real terracotta has its bumps and grooves. Cover the entire pumpkin and allow it to dry.
Step 4: Achieve That Earthy, Worn Look
Once the textured paint is dry, it’s time to give your pumpkins that earthy, aged finish. Lightly sprinkle some flour on the top of the pumpkin, then use a large fluffy brush—an old makeup powder or blush brush works well! Gently spread the flour around, brushing it into the crevices for that perfectly-worn look. This step adds so much charm!
Step 5: Display and Enjoy
Now for the fun part—find a cozy spot in your home to show off your handiwork. These terracotta look-alike pumpkins are sure to bring warmth and rustic beauty to any fall display. Whether they’re on your front porch, dining table, or mantel, they’ll make the perfect addition to your autumn décor.
And there you have it! A budget-friendly DIY project that’ll bring a little Pottery Barn charm into your home without the splurge. Happy crafting!


