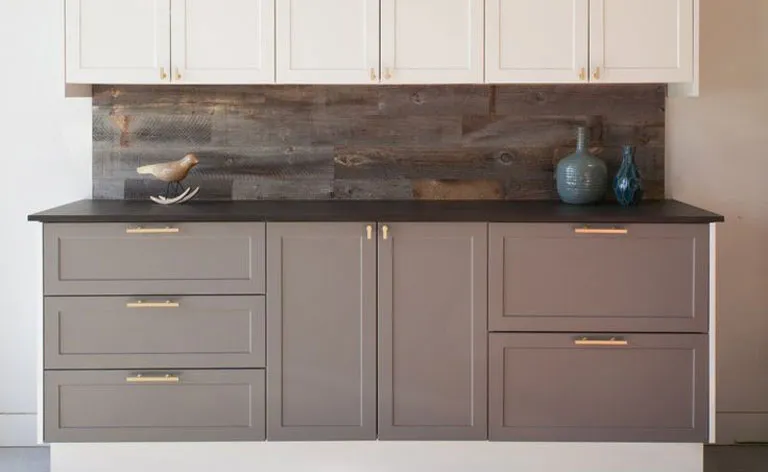
Whether you’re tired of the honey oak finish or looking for a cost effective makeover, sometimes all you need is a fresh coat of paint to breathe some life back into your cabinets.
Planning and preparation are key to success here. If you’ve got the space, painting all the cabinets doors at once may be the most efficient. This, however, may not be ideal in homes will small kids and curious animals. Below are a few tips to making this project go smoothly from start to finish. A note to all the first-time cabinet painters out there– you may want to plan on this being a two-weekend project. This will help achieve the results you’ll be happiest with in the long run.
Preparation
- Prepare to spend the entire weekend (or possibly two on this project). Distractions are likely to happen. A rushed job will result in poor results.
- Take time to complete the proper prep work. Really scrub and get those cabinet clean, otherwise the new paint may not stick.
- Remove cabinet doors and hardware. It’s best to set the doors on a flat surface out of the way. Keeping them flat will help avoid drip marks.If you’re keeping your existing hardware, place the knobs/pulls and screws from each cabinet door in a small storage baggie and label each bag with a permanent marker. Place a sticky note near the coordinating cabinet door. Reattaching hardware will be a breeze when you know which knobs go on which doors.
- Carefully tape off your countertops and walls. To protect your floors and workspace, lay a plastic drop cloth with a canvas drop cloth on top. The canvas is less likely to budge or get blown around, and the plastic will stop any paint from seeping through.
Cabinet Care
- Use wood filler to patch up any cracks or holes in your cabinets and doors and let dry. Apply a second layer of filler where necessary. When completely dry, lightly sand any putty spots until smooth. You may want to sand your cabinets and doors to help the primer smoothly stick to the surface, just be sure to wipe all dust with a tack cloth before moving forward.
- Do not skip the primer. For best results, use primer specifically made for painting cabinets or painting over previously finished wood. Ask your home improvement associates for paint best suited for this project. We suggest using a paint with a bit of sheen to it, like satin. Invest in some good, fresh brushes, ones made for the type of paint you’re using.
- Patience between coats is a must. Follow the instructions on the paint can. DO NOT begin sanding or applying the second coat before the first coat has fully cured.Pro Tip: Seal your paint brush in a plastic storage baggie and toss in the refrigerator overnight. No extra clean up tonight!
Patience & Precision
- Thoroughly sand cabinets between coats. Sand light enough to remove any grit and smooth out the surface. You don’t have to be too rough here. Vacuum, then wipe off any dust with a tack cloth.
- Apply at least three coats, one primer and two top coats, for the most smooth and professional looking results.
- Allow cabinets to dry for a long time before rehanging, and even longer if you’ve got humid weather during your DIY weekend.
Now you’re ready to enjoy your newly made over space!
Source: remodelaholic.com, findrealaustin.com,
younghouselove.com
Photo: semihandmadedoors.com